Friday 15 March 2013

Beetlejuice - Handbook For The Recently Deceased Build

So - I've wanted a Handbook for the Recently Deceased for a while now, but didn't know what book to build one around. After all, you'd want to be able to read it, wouldn't you?

I found one of those craft box / fake book things housing a letter-writing set for a pound - looked to be the right size, and thick enough too. No pages :( , but it'll be useful for storing bits & bobs, or sweeties on Halloween. Sold!

So - how to make the cover? Simplest way would have been a dust jacket, but it wouldn't look quite right. Found some leather-effect paper, and considered that for a while...

Until screengrabs showed the book to be fabric covered. Hmm.

On a recent recce to one of my local Pound Shops (that's 'Dollar Store' to you Americanese speakers), I spotted some Inkjet printable canvas, two sheets to a pack. Kinda like those framed canvas posters you can have printed up.

Didn't hold out much hope for the quality, but the price was more than right, so what the hey. Sold!
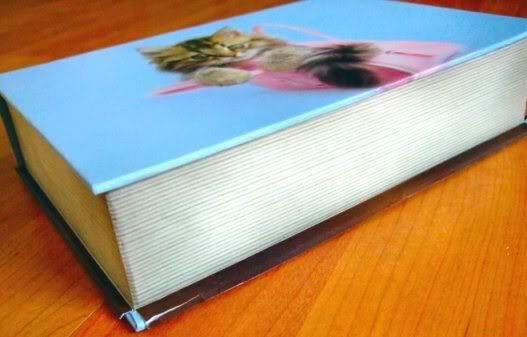
So now I had this:
Aw, nice kitty!

Size reference:

Note to Warner Bros.
Any Beetlejuice special edition should be packed inside one of these, appropriately detailed as the Handook!

Box / book open:


Either the pink goes, or I do.

After measuring up & designing the cover to fit over two sheets of the A4 canvas, I also created the pages to wrap around, and printed them out onto matte photo paper.

So now, I had this:
 
 Front cover and overlap spine on one sheet, the back and partial spine on the other.

Cover image was cleaned up & fixed from a pic of the Hot Topic tee (curiously, the HT tee design seems to have been made from the magazine version seen at the end of the film - the cloud over the sun is missing from both).

The reveal pic of the Handbook (in the movie) shows the cover to be rather light in colour (almost reddish orange), but all other scenes show it as quite dark. I hedged my bets, but went with a darker brown for the back, but slightly lighter front cover and spine.

Cut out and glued the pages to the box, trimming the edges tight to the corners.

I included a lip on the pages' edge to hide the join with the cover, just in case:
 
Make the best of your time, kitty!
 
Looking more like a book now, I think!

After buying a new glue stick (Extra Strong Pritt Stik), I proceded to apply the canvas cover. A little tricky this, as the canvas wouldn't stay folded over the cardboard cover edges (clothes pegs handy here!).
 
If making this again, I'd probably use rubber adhesive, or contact adhesive.

And here we are:
B'bye kitty!
 
You can see the overlap from the back cover along the spine there.

And after that bit of practice, I did the front, including the spine:

See the title on the spine? Yeah, I shoulda put that text vertically. Ah well, next time!.
 
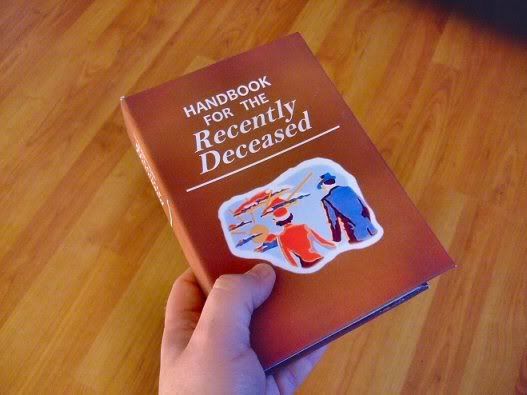
Put the publisher info at the bottom of the spine, just for fun.

I also added a couple of inner pages, just for the heck of it. Title page was easy enough. :) Stuck to the spine on the inside, also covers the visible edges of the canvas. Still usable as a box too.
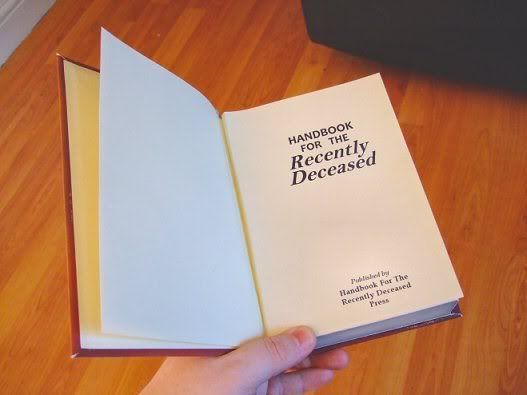
I don't think we survived that crash...
There ya go! Pretty straight forward, really. Still got a few things to do - hide the seem & edges with a brown marker, dust it up a bit & age the corners a bit too. May give it a coat of sealantor something, as the canvas does fray.

Really recommend the inkjet canvas for a book cover like this!

Here's a close up of the cover image showing the texture:
 

Lookit that texture!


I think the canvas would work better on an actual book, as I had to play around with the edges of the cover to get it to fit. The material can fray when cut, so use of a sharp blade is best for trimming.

The canvas took the inkjet print really well. I expected a little softening of the edges, but it came out very sharp!
The printable coating is only on one side, so if one were to use this stuff to make a map,for example, the back would probably take weathering & aging a little differently.

This would be great for quick & dirty embroidered-style patches for a costume, tho they may need sealing.


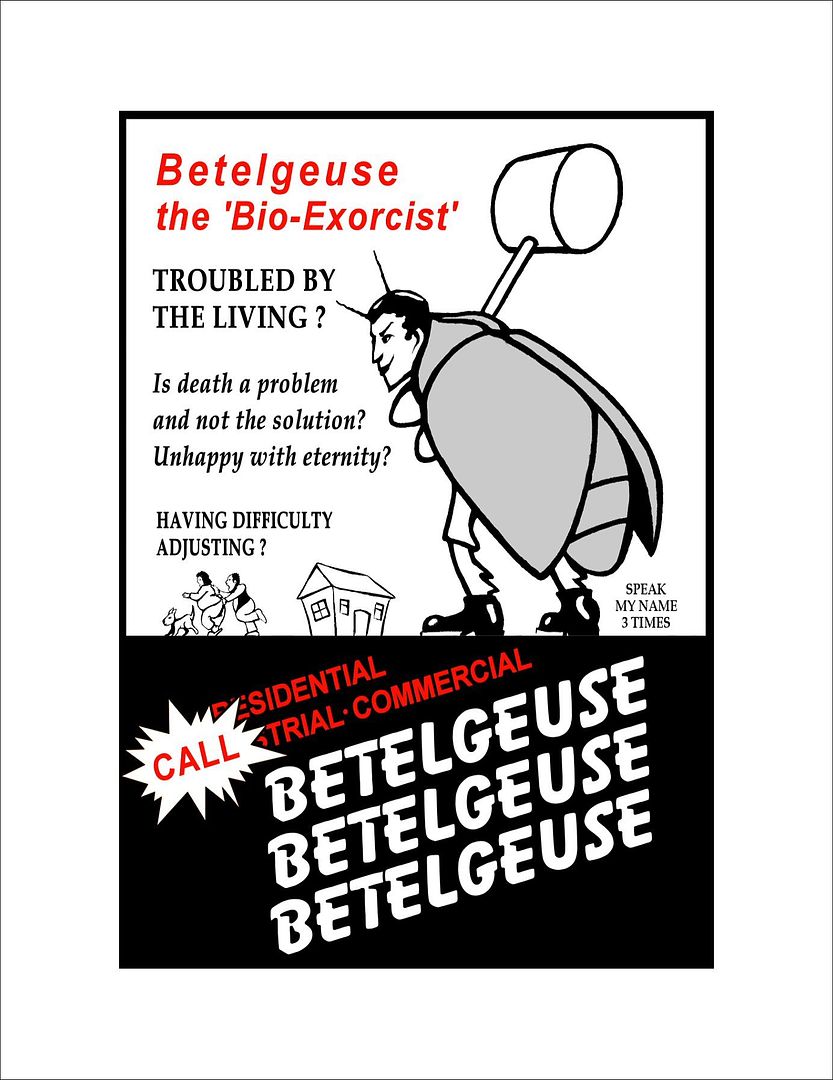
BONUS! Beetlejuice flyer from the book!

Had some free time today, so I made the Betelgeuse flyer that falls out of the Handbook. Don't think I've seen it around? I know how pointless it is to say it, but please don't steal it for profit.

Hand drawn from screengrabs, tho the running family is almost all guesswork.
Would make a cool T-shirt!

Paper size (print to fit page) (click to enbiggen:
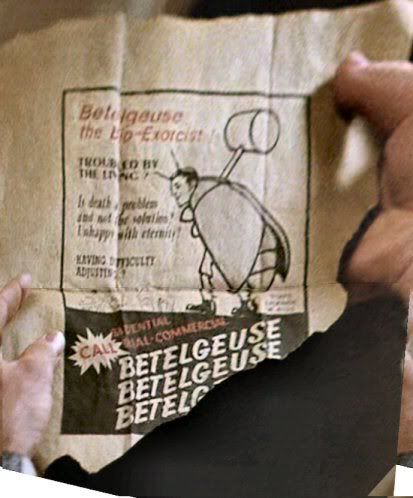
Screencap:


The result after a little tea-staining:

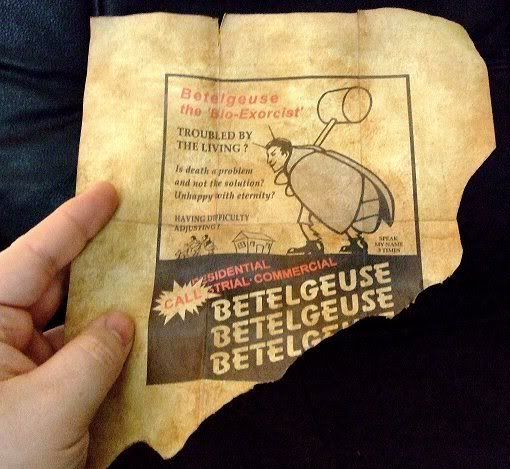
Probably went a little heavy on the staining, but its fine for it!

Once dry, I sprinkled a little talcum powder on it to smooth it out - fades the ink down a tad, and once rubbed in gives an almost greasy, aged sheen to the paper.
Grateful thanks to Howlrunner on www.therpf.com for pointing me in the right direction on a couple of points!

Thanks for reading!
Coz.
 

Saturday 7 July 2012

First Post! First Puppet!

Hi! Welcome to my new - well, only Blog! I hope to post my custom props, info, ideas, and whatever takes my fancy, assuming I don't screw this up! Now, on with the show, here...

First off, meet Nino! He's currently my roomy. He tells me he has a famous cousin in the States on some TV show, but I think he's pulling my leg.

He thinks that T-shirt is funny. He would.

He's currently awaiting an eye transplant to some whiter eyeballs. He's got kind of a jaundiced view on everything at the moment.


He's sort of a 'mutt' or a Bitza puppet (bitza this, bitza that...) made to practice my puppet building ninja powers - uh, skills.

He's made of red fake fur (I won't say 'faux' as it isn't even trying to look real!) from the craft store with a felt mouth lining (it was quick and cheap, okay? Sheeesh).

His head is from the Blatch pattern (available everywhere via your local internet - or here: http://puppetbuzz.com/2007/06/21/the-purple-necked-black-bearded-blatch-with-full-size-pattern-download/ ) unaltered bar the addition of a slightly fuller mouthplate.

The mouthplate was made of two pieces of stiff grey cardstock onto 1/4" yellow foam. The card was covered with polar fleece glued down over a trimmed makeup sponge for finger positioning.

I then added fleece pockets to hold the fingers and thumb in place - I folded the fleece around two 1/4" foam 'D' shapes, and stitched it all together.


This, you might already know, makes it incredibly hot after 2.7 seconds (approx.) - I'll try a different method next time! I created a hand sauna.


The body is the Project Puppet Simple puppet pattern body (here: http://www.projectpuppet.com/ ), with no mods (don't worry, the rest of the pattern is gonna see a fair bit of use too! I've got, like, all of the downloadable ones now - I'm kinda spoiled for choice!).


The curved arm pattern I found over at puppetsandstuff.com in Billy D. Fullers' Gallery Album (Here: http://puppetsandstuff.com/community/index.php?action=gallery&g2_itemId=18395 ).
I altered the pattern to make the arms narrower, and shortened it a bit - tho it coulda been the size I printed it out at.

The hands I wanted to make poseable, so I used the Project Puppet instructions (Here: http://www.projectpuppet.com/servlet/Page?template=arm-rods-tutorial ) and tailor made a foam pattern for the hands with a custom palm support. I used 1/2 and 1/4 inch foam for this, as two 1/2" pieces woulds been too thick to fit, I thought.
Amazingly, I was right! I had to sit down.

At this point I realised I had a choice - fixed or removable rods? Well, in for a penny...
Removable it was - just gluing 'em on seemed a bit churlish by this point. But the doll joints I had were too big for the hands - what to do?

I'd read and understood the Puppet Planet website instructions for removable arm rods (Here: http://puppet-planet.com/rodarmtutorial.html ), which seemed the best option. I'd already bought a bag of doll joints to attatch the arms - only they were about as big as the hands were!


So do I Dremel down the doll joints? I guess I could just cut off the edge to a palm support shape, then drill holes for the finger wires, thus eliminating a step.
Very tempting, but I was sure I had something similar to doll joints...

Jean buttons! Replacement ones, actually. Metal cap, plastic body, spikey rivet to hammer in. From the fabric store. Cool.


It was so crazy it just might work.

NOTE: To calm those of a nervous disposition, please relax in the knowledge that it did actually work! And even better, still does!

I'd already custom made palm support pieces from two layers of that grey cardstock. I then reinforced it by coating them with a layer of Super Glue (Cyanoacrylate). Hardens the outside of the card like a coat of resin, pretty much.
Yeah, probably didn't need to do this, but it made me feel better about using card in there).

I made a hole in the palm support piece, and pushed the metal spikey rivet through it. Then I laid a piece of red felt in there to stop the end of the rod ripping out clumps of foam.

Stop - hammer time!
Smacked the button part onto the rivet, making sure it was fixed good and solid. I hot glued the rivet to the palm support, and added a few drops of Super Glue to the base of the button to stop it from turning.

Fingers were made from twisted garden wire, trimmed to size and glued in with both superglue and hot glue, then I used Contact Adhesive to stick the foam hand pieces together, sandwiching the palm support and the button in its red felt cocoon.

As I said earlier, I used 1/4 and 1/2 inch foam for the hand pieces, with the 1/2" piece on the outside. I followed the Project Puppet hand tutorial step by step, and found that the difference in foam thickness didn't make any difference at all.
If it wasn't for my dirty glue fingers, the puppet foam hands woulda looked just like the examples on PPs website.

I'd already sewn up the arms, but I'd left part of the hand seam open to insert the foam hand. Tight fit, and I worried about tearing the foam fingers, but they got in there without much trouble.


I skipped stuffing the arms - I liked that floppy Grover-ish look to them. The arms were fitted to the body with doll joints, as seen in a couple of How-To vids on YouTube, but I didn't think just gluing the fabric to the doll joint washer was gonna cut it.
So, I got some extra-strong thread and basically made the top of the arm into a coin purse opening (or if you want to be coarse, a sphincter). Perfect!

I had to look out for some eyes, and sniff out a nose too. As for his tongue, I had that licked. Ahem.

Using a few online pic references, I drew up a throat & tongue (even tho I'd used black for inside the mouth, I'd get use out of the throat on other projects).

Here ya go:
Classic Tongue and Throat Pattern (link as image is large)
I just used the tongue pattern and some pink felt (actually did it twice - the first pink was too pale, and looked washed out what with all the red). Just glued it in there ("You've got a tongue. I should know, I stuck it there myself!" ).

So now a nose needed to be picked. >cough<
I wanted that egg / pear shaped nose seen throughout Muppetdom. But Nino's only a little guy, and finding something so small the right shape was tricky.

I'd found a light blue fur pencil case at a Pound Shop (think Dollar Store but with more junk). The fur is more of a fuzzy 'pile', which would hide any stitching better than the polar fleece I was gonna use.

So now I had to figure out a pattern for the nose. Simple, right? I was stumped. If Nino ever needed glasses, they'd just slide off his face!
I found a pattern online for a fabric easter egg, and that gave me an idea (yeah, it hurt).
I hadn't thought to make the nose like a foam head pattern.

After a little tinkering, this was my pattern:
Egg Shaped Nose Pattern (link as image is large)

BTW: Check my Photobucket Album for the patterns & pics: My Photobucket Puppet Album

On the back of the nose 'outer' fabric (in my case, fuzzy fur), sew A to A, and B to B. With the nose still inside out, sew on the back 'inner' part.
Now slit the center line on the Inner, and turn the nose right-side out.
Pick the nose (hah!) seams free of caught fur. Stuff with polyfil (I slaughtered an old pillow), and stitch up the slit. Squish the nose around to even out the shape.


I stitched the nose to the barely visible centre seam of the face, putting stitches through the already sewn center slit for strength, and to help alignment.

Now Nino smells. Heh.

While I was in the Pound Shop, I nudged aside the zombies long enough to spy a ball-firing gun capable of distances of up to six whole inches. It had two yellow ping-pong sized balls made of that soft plastic only manufactured in China. Bingo!

I epoxied a short piece of thick wire into the premade molding holes one one side of each ball, then added more glue and joined them both in holy matrimony together.
Once the glue set, I wrapped thread around where the join was, and tacked it tightly to Ninos' head, wrapping extra thread around the stitching before knotting it off.
This stops the eyes wobbling about so much.
I've added a small coil of marabou boa for hair - very close match, colour-wise, but it flows about well.


As a bonus I can position the eyes to look up or down (the addition of a finger-operated lever and eyelids would make the eyes seem to blink or close).

Pupils were trimmed from good quality black electrical tape.

TIP: If you have any stickers or something with removable backing - save a piece! Stick the tape to that and it's a heck of a lot easier to draw out circles onto and cut out pupils with scissors.

The t-shirt is actually one made for very small dogs! I found it in the Pound Shop. Wretched hive of scum and villainy, but they have some useful stuff.

Oh, the arm rod I made from 3/32 inch Piano Wire epoxied into the dowel handle from a foam paint / glue brush. I added black heat-shrink tubing to the wire because it doesn't scratch off like paint. Also, it's cool.


I added a screw-in eyehook to the end so it can be hung up, or to add a wrist loop.

Thanks for reading this essay! It was completely unintentional, but I seem to have verbal diarrhea of the fingertips.
If you got this far, go have a drink. You've earned it!
I should be back soon with more stuff to share!

Cheers,
Coz.